Microsoft Entra ID Single Sign-On (SSO)
This guide walks you through enabling Microsoft Entra ID single sign-on for your Tendium organization. Once configured, team members can log in using their company Microsoft accounts.
Prerequisites
- You must be logged in as the company admin for your Tendium account
- Access to the Microsoft Azure portal (your IT department will need to perform some steps)
Part 1: Open the Security settings in Tendium
-
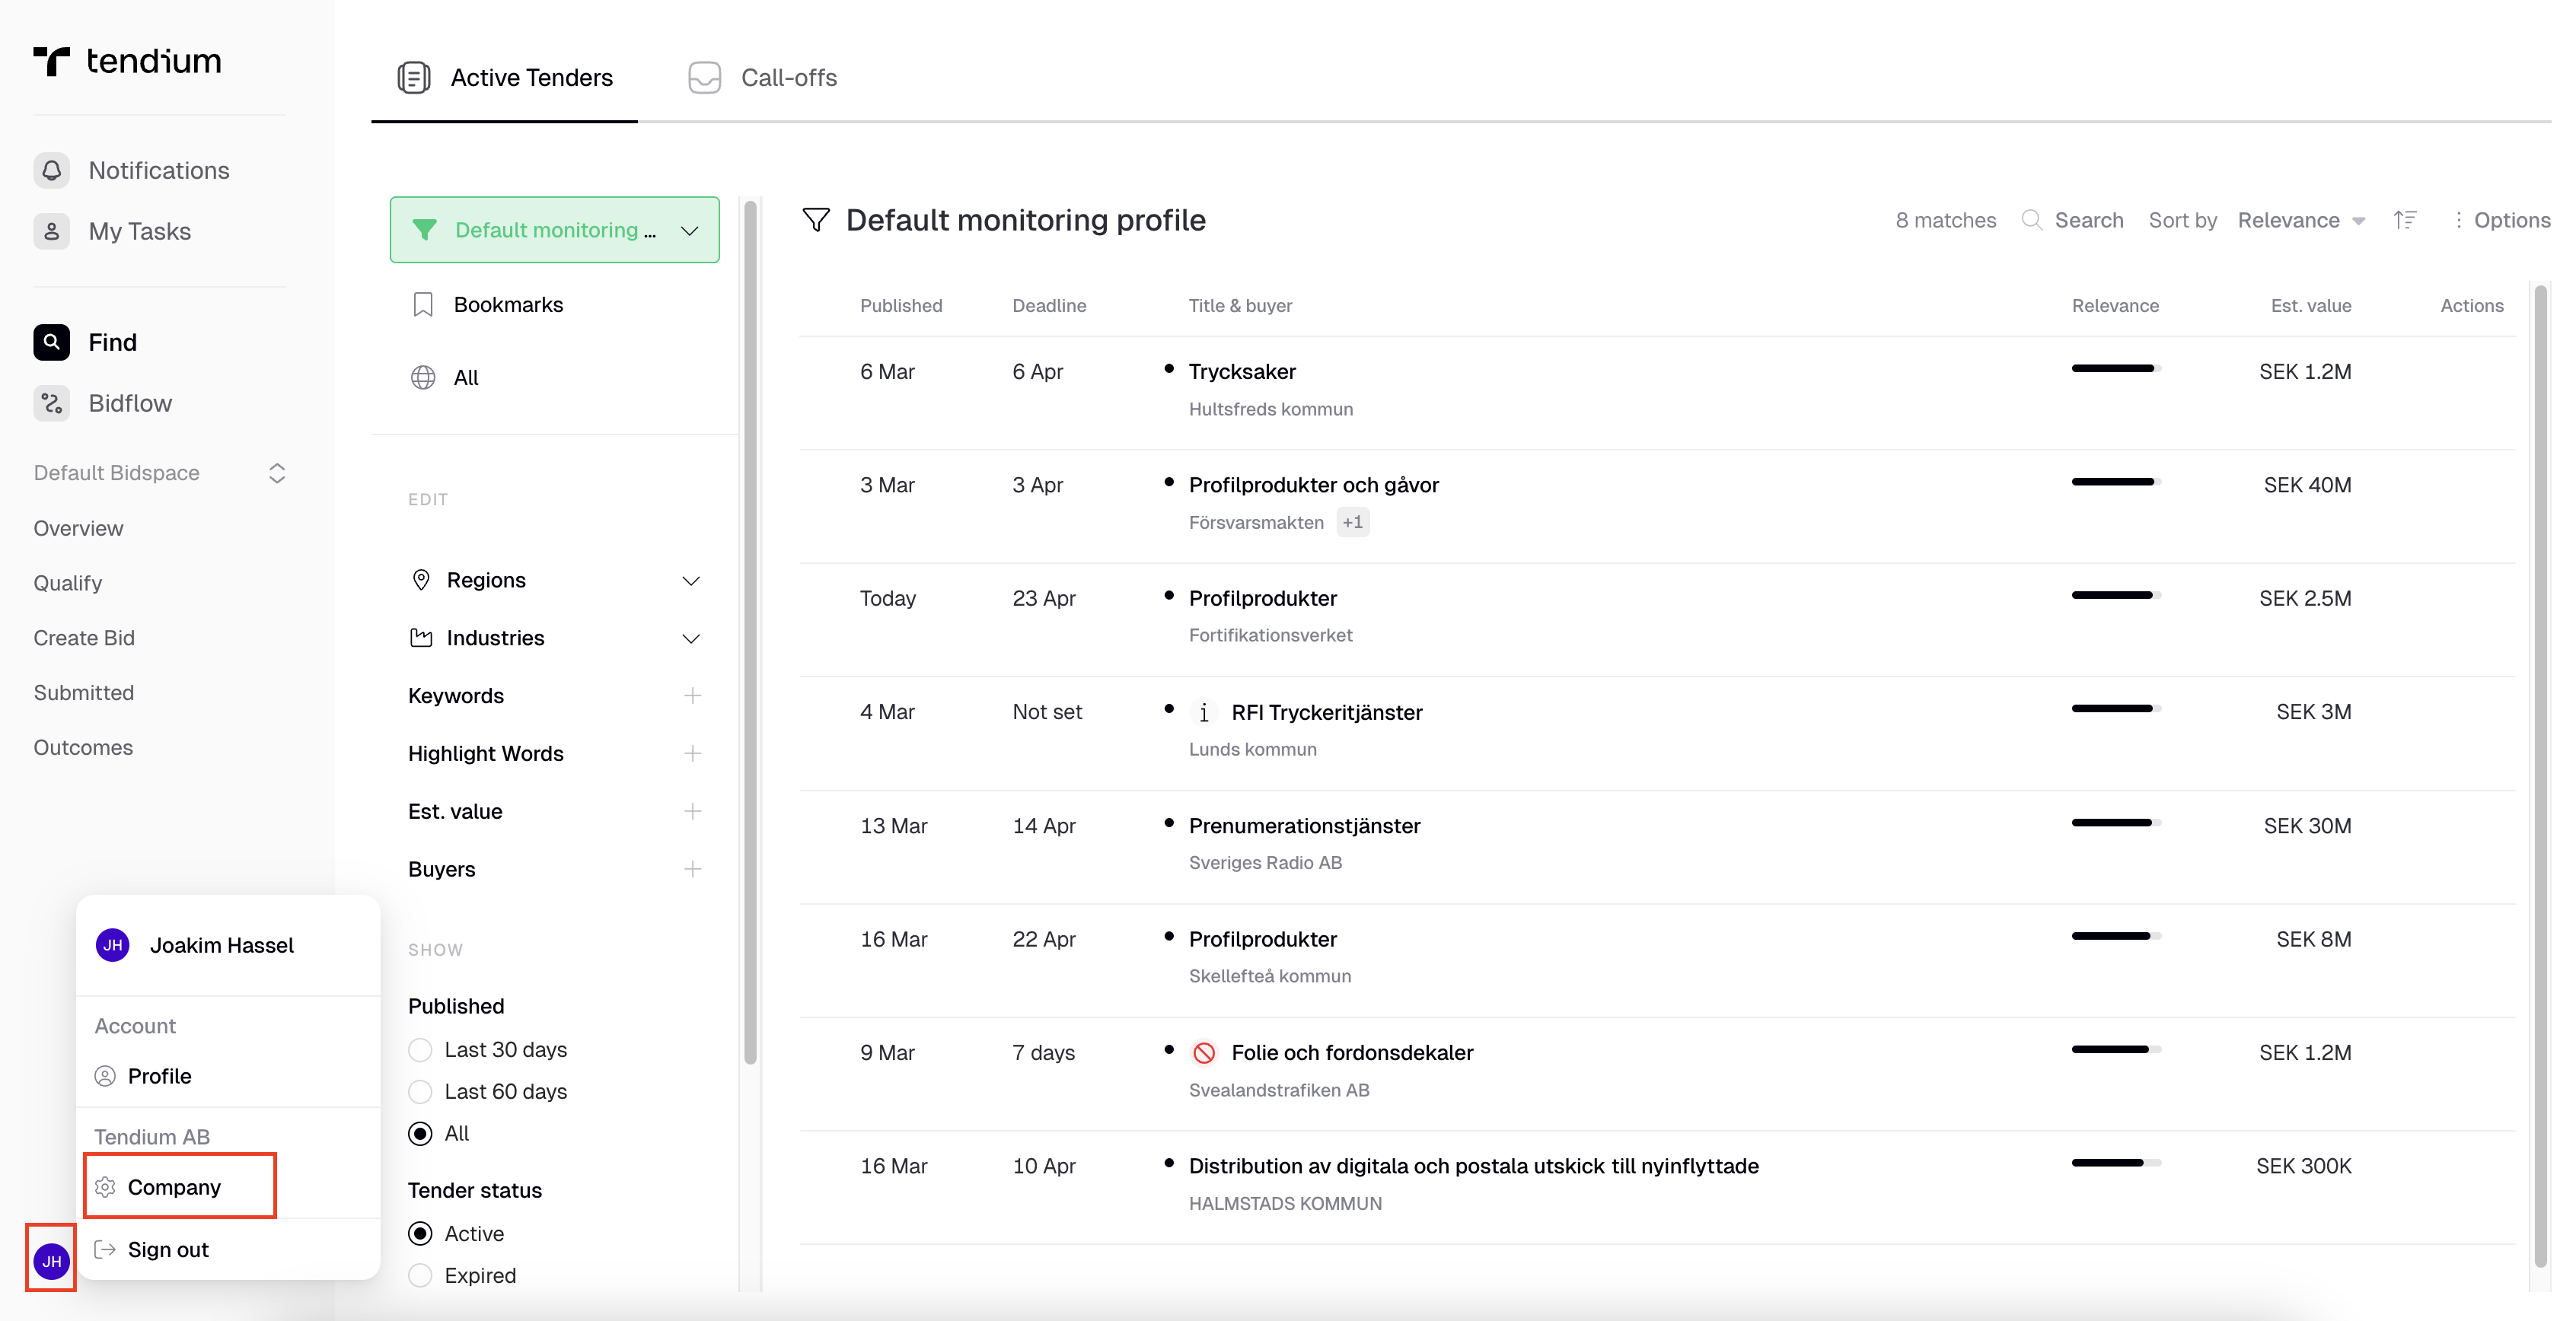
Go to https://app.tendium.com/auth/sign-in and log in as usual.
-
Click your name in the upper left corner and choose Company.
-
In the left panel, click Security.
-
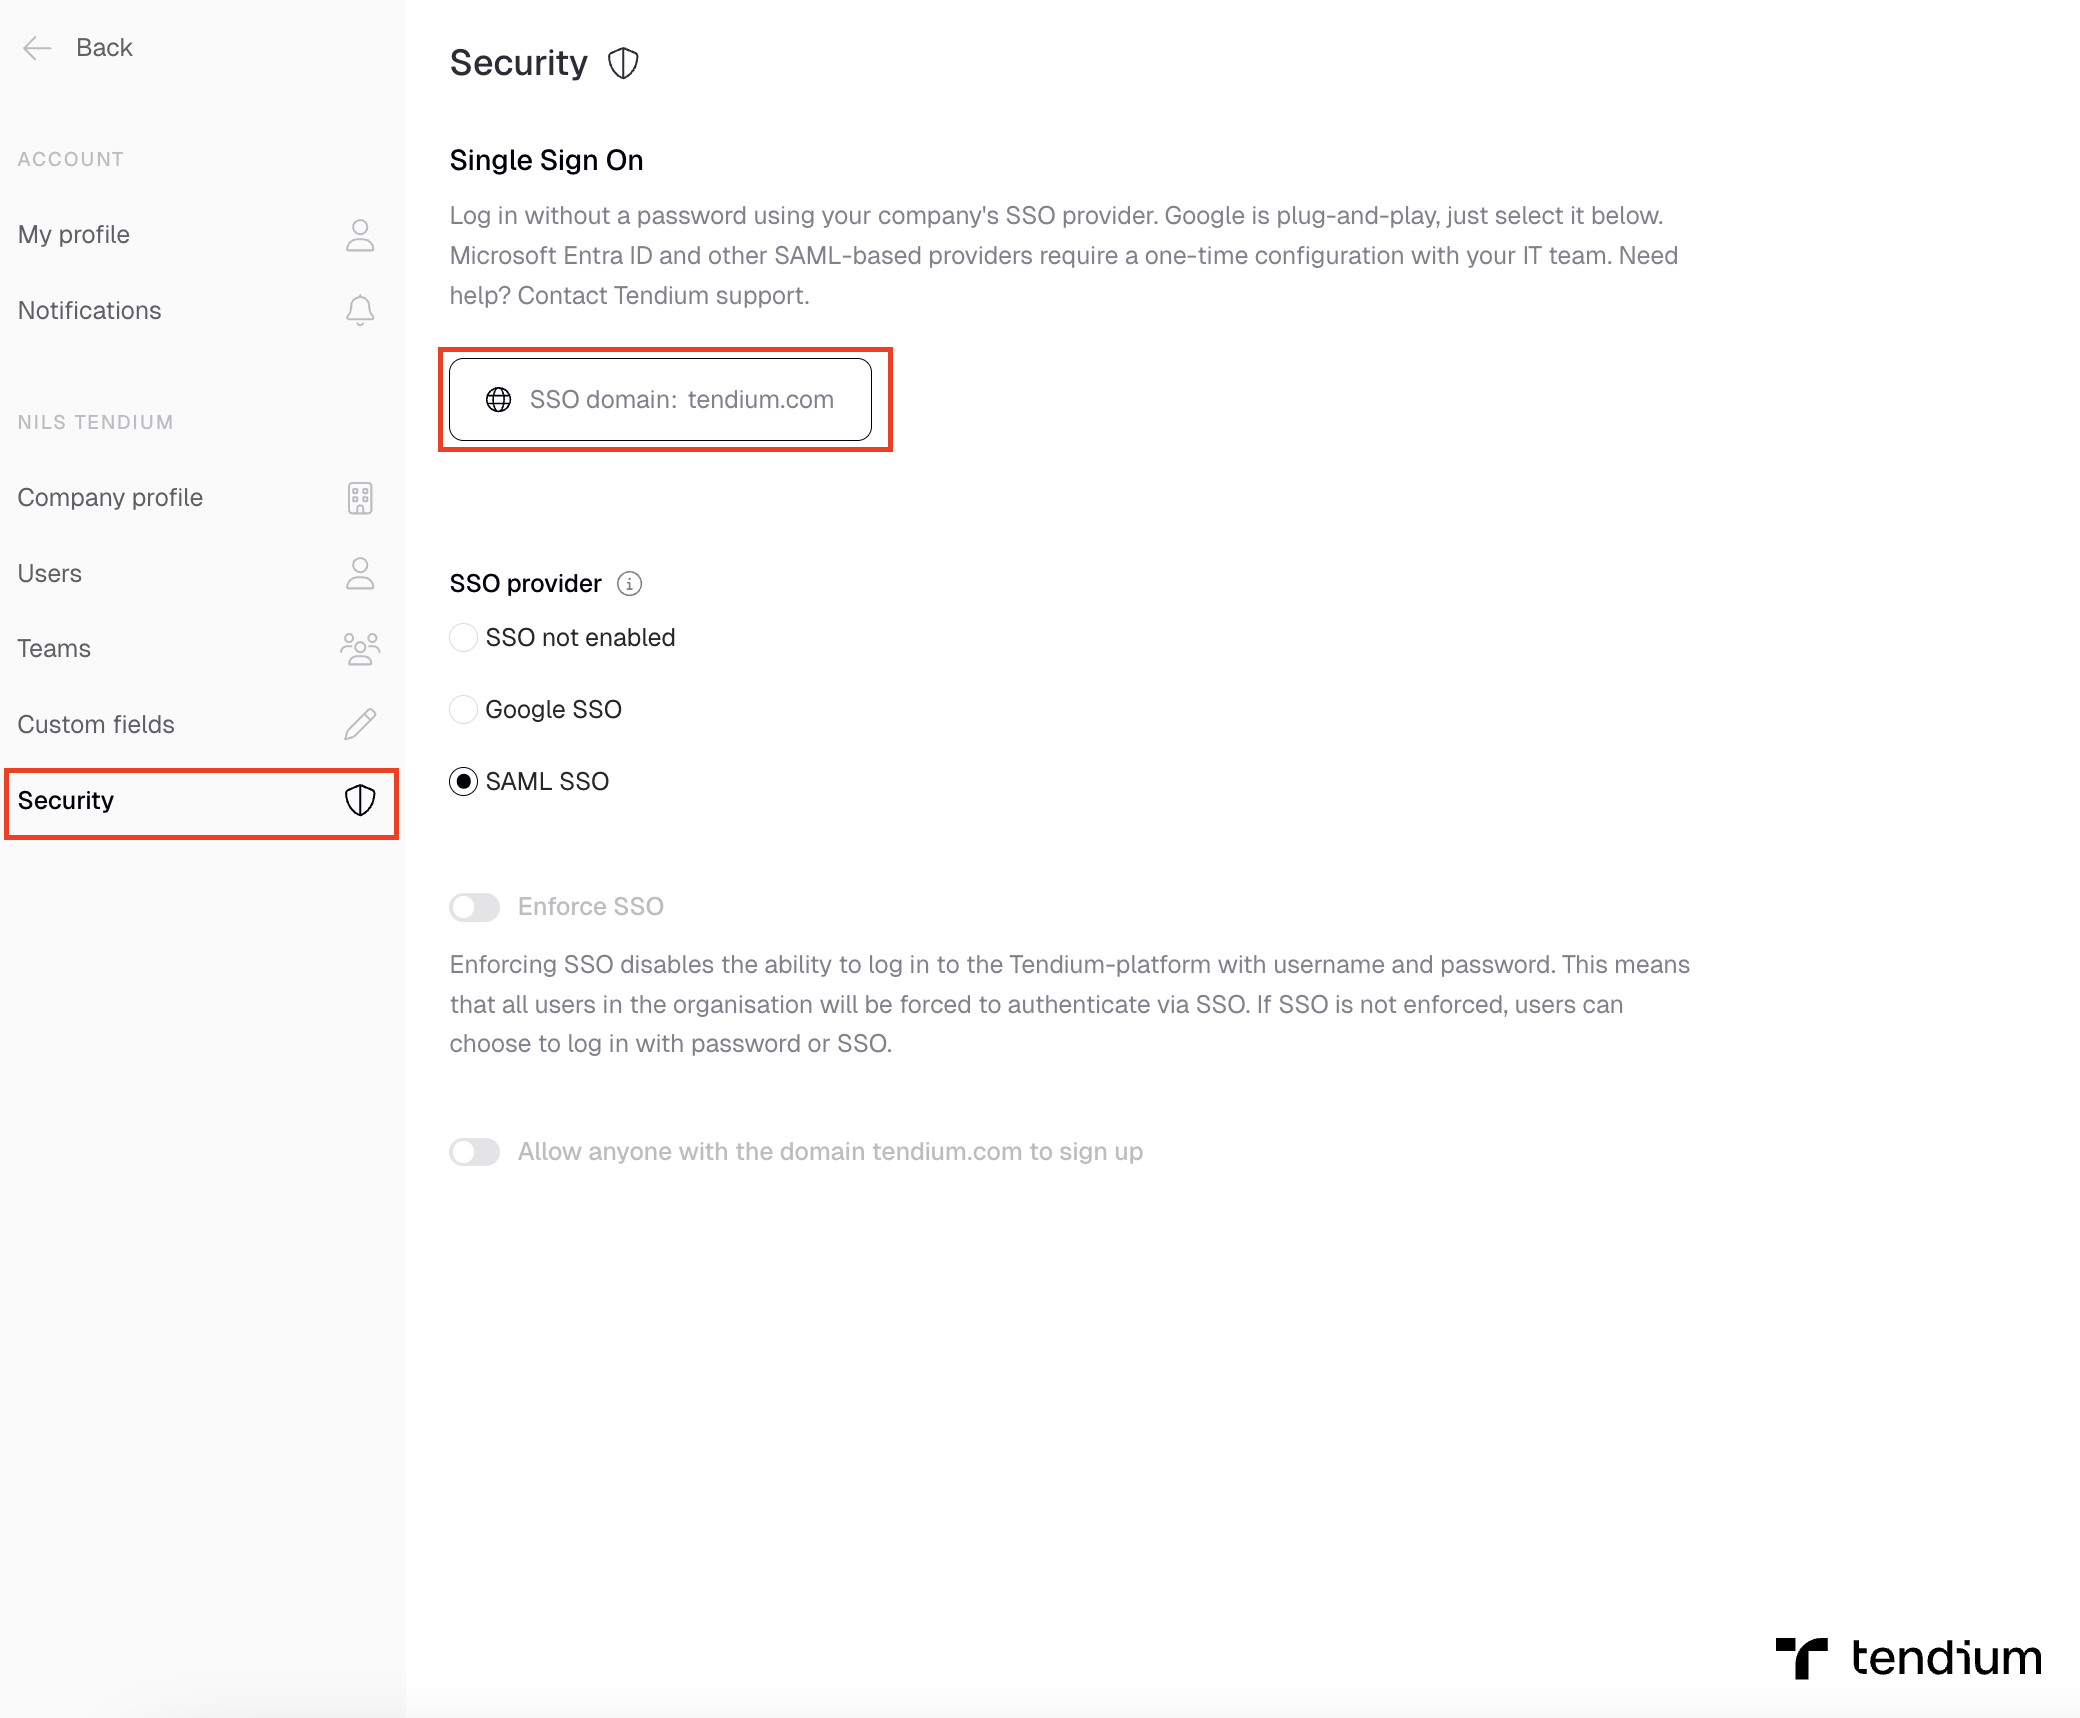
You will see the Single Sign On section with your SSO domain displayed. This should match the domain your company uses in email addresses.
Part 2: Select Microsoft Entra ID as your provider
-
Under SSO provider, select Microsoft Entra ID.
-
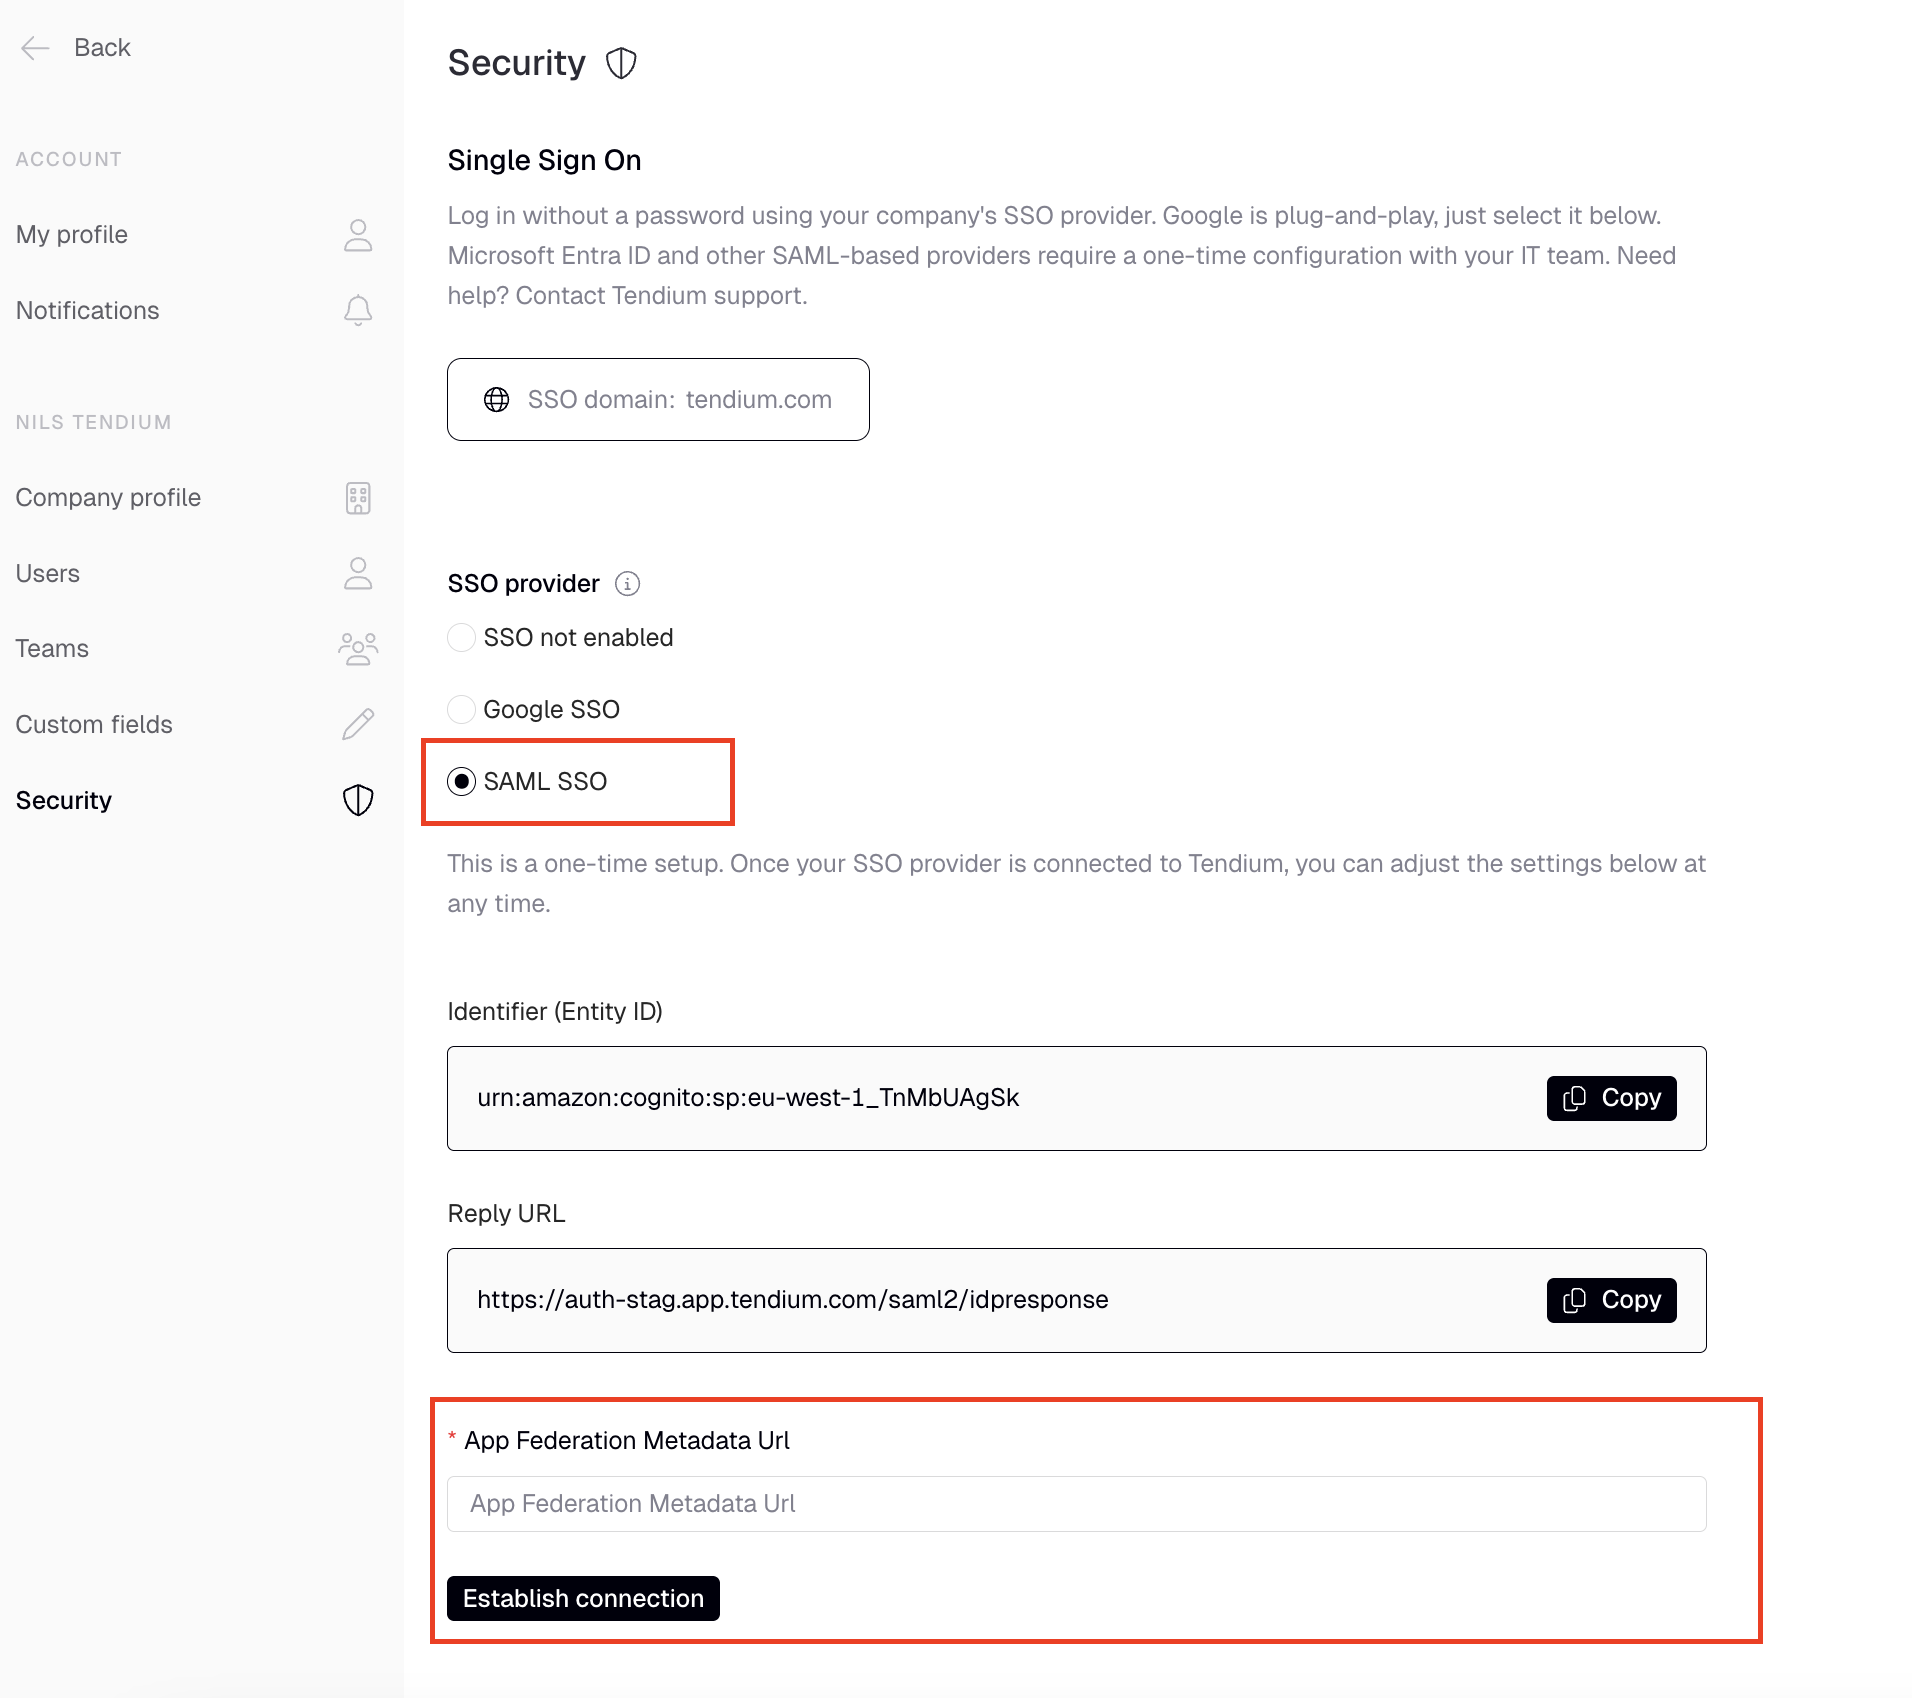
You will now see fields for Identifier (Entity ID), Reply URL, and *App Federation Metadata URL.
-
Keep this page open — you’ll need the Identifier and Reply URL values when configuring Azure, and you’ll come back to paste the App Federation Metadata URL.
Part 3: Set up Tendium in Microsoft Azure
- Sign in to the Azure portal using your work account or a personal Microsoft account.
- Open the left navigation pane and select the Microsoft Entra ID service.
- Navigate to Enterprise Applications and then select All Applications.
- Select New application in the top bar menu.
- In the Browse Microsoft Entra ID Gallery section, search for Tendium and choose the app with the Tendium logo.
- Click the Create button to add the Tendium application.
Part 4: Configure SAML in the Azure portal
- On the Tendium application overview page, find the Manage section in the left navigation pane and select Single sign-on.
- On the Select a single sign-on method page, select SAML.
- Click the edit icon for Basic SAML Configuration to edit the settings.
- Enter the values from Tendium’s Security settings page:
- Identifier (Entity ID) — copy-paste from Tendium
- Reply URL — copy-paste from Tendium
- Sign on URL — copy-paste from Tendium
- Click Save.
- On the Set up single sign-on with SAML page, scroll to the SAML Signing Certificate section and find the App Federation Metadata URL. Copy this URL.
Part 5: Complete the setup in Tendium
- Go back to the Tendium Security settings page you left open earlier.
- Paste the URL in the *App Federation Metadata URL field.
- Press Establish connection.
- Toggle Enable SSO.
Part 6: Add users in Azure
- Go back to the Microsoft Azure Portal and under SAML-based sign-on, select Users & Groups in the left pane.
- Click Add to add staff members and colleagues who should have access.
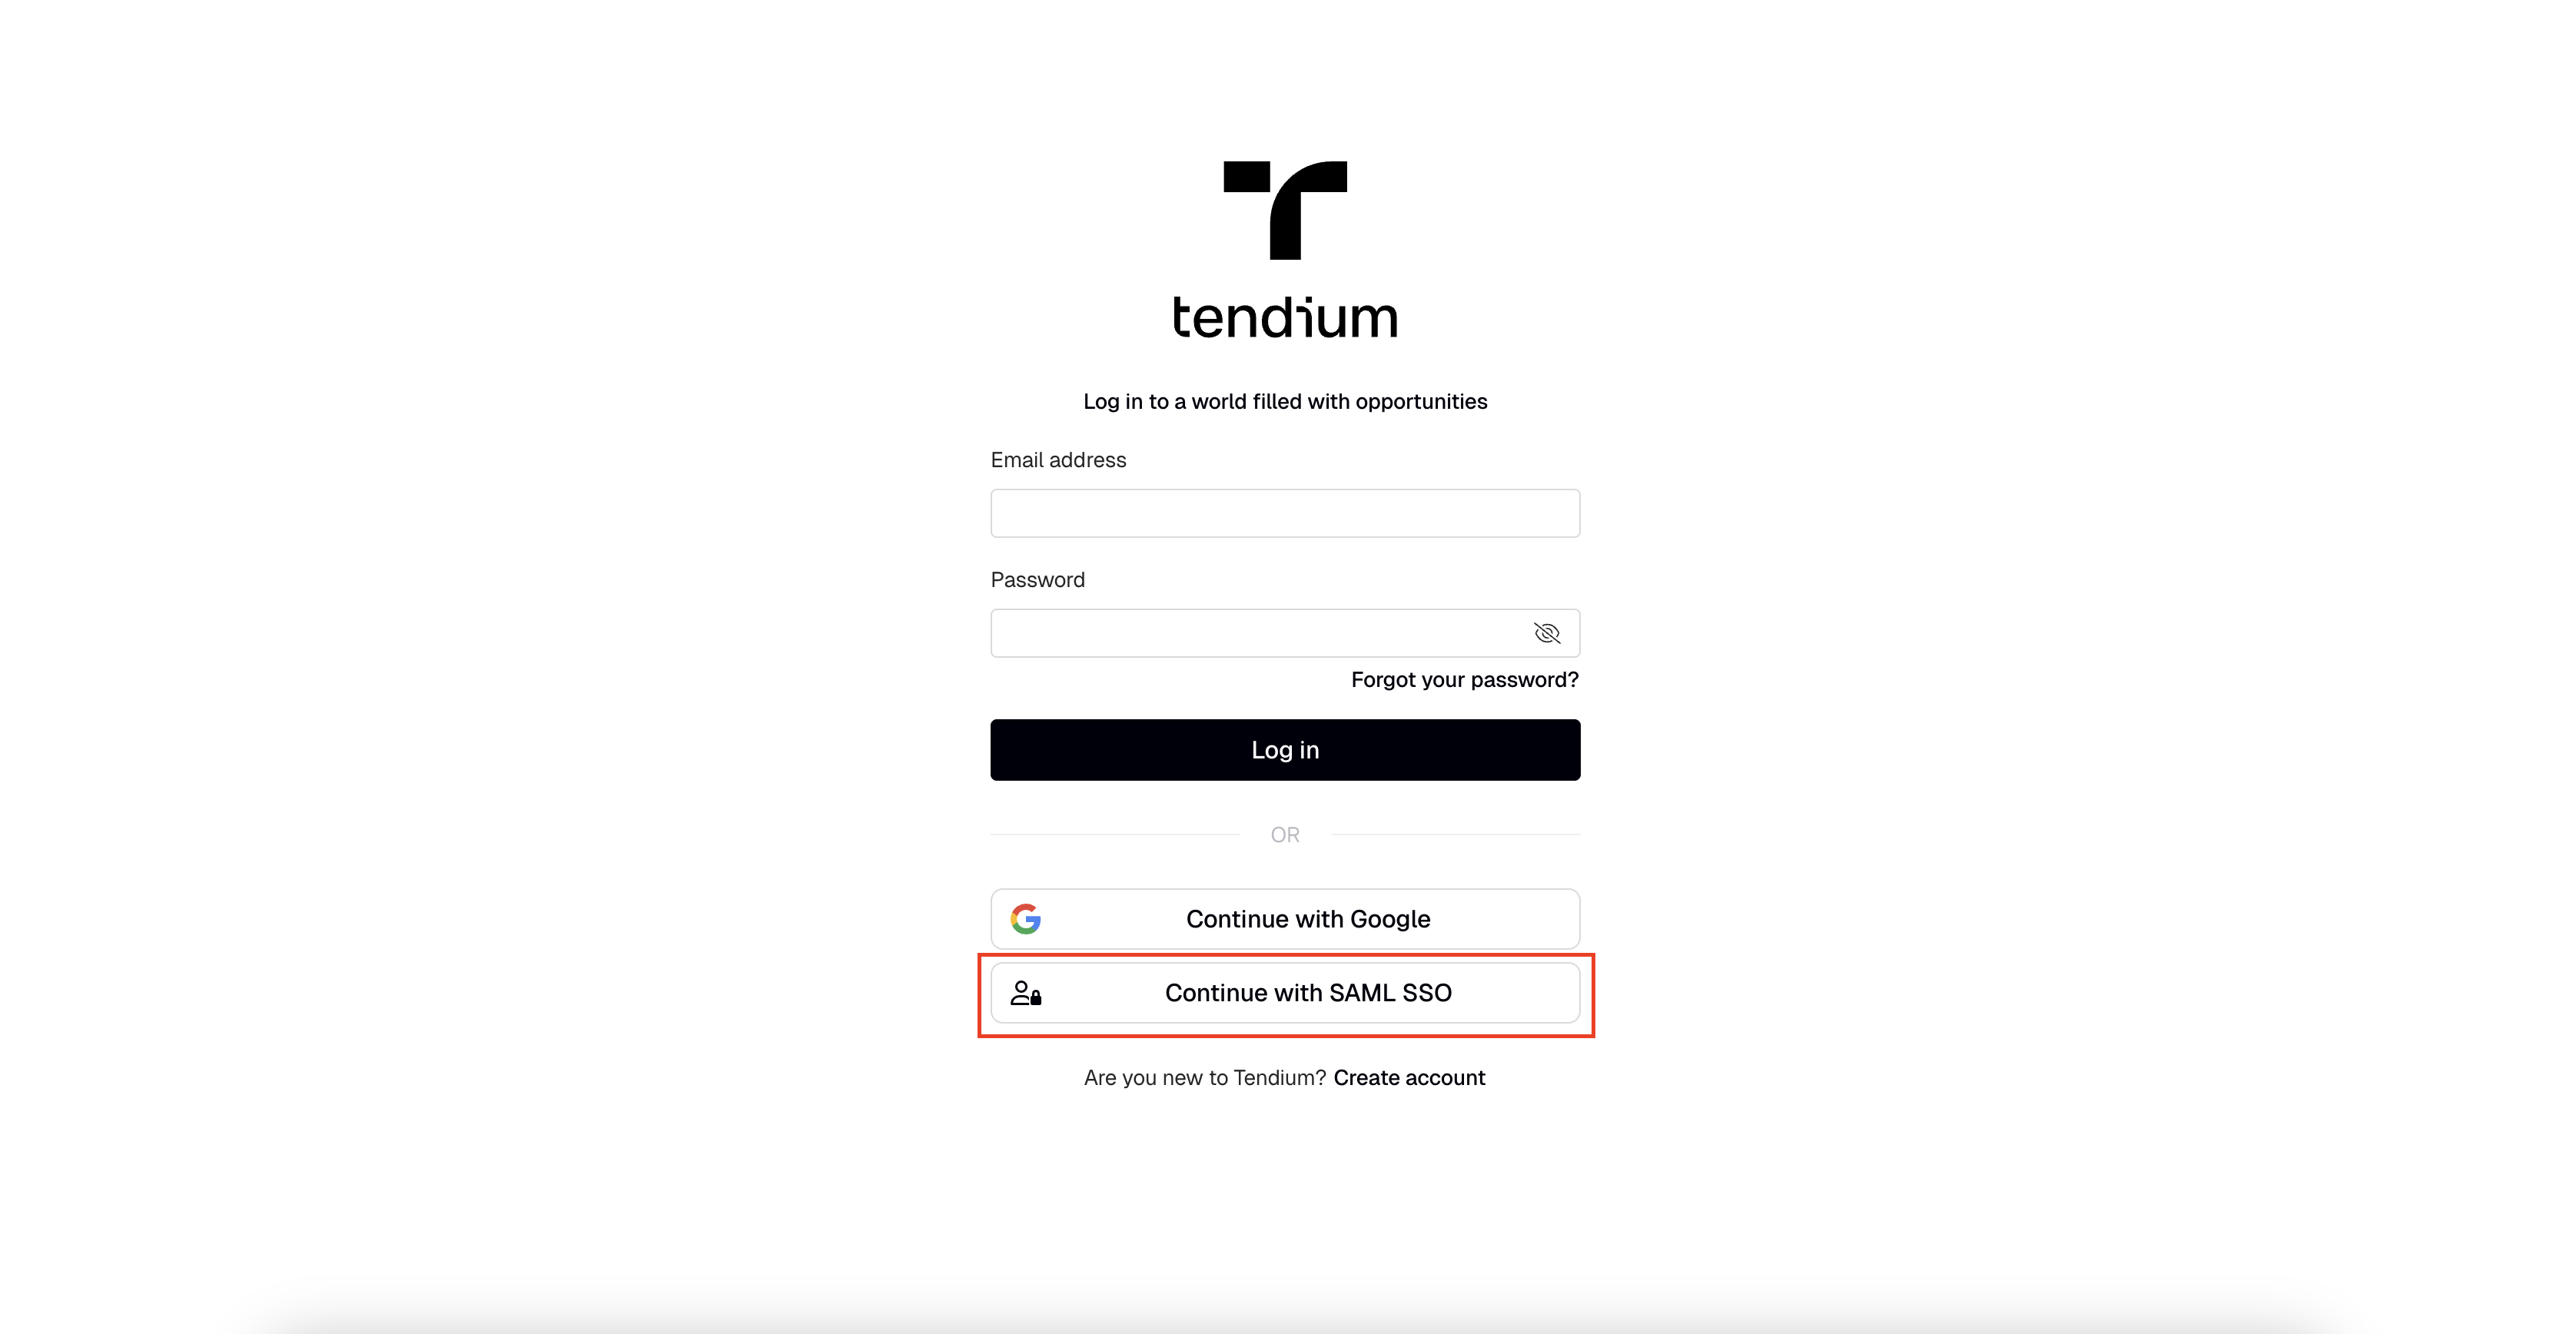
How your team logs in
Once SSO is enabled, your colleagues can log in at app.tendium.com using the Continue with SAML SSO button on the login page.